http://www.khalafoud.com
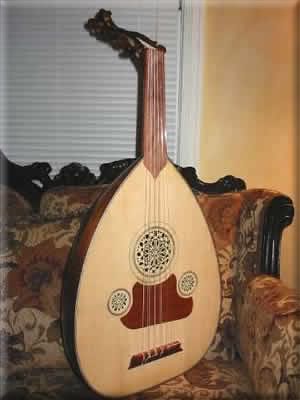
In January 2002 I received an Oud as a gift. This was a Turkish oud made by Cankaya Music in Istanbul, Turkey. It was modified for better sound and playability by oud maker Najib Shaheen. A few weeks after I received it, and after the urging of a few individuals, I considered the idea of building my own. Being quite frugal I thought that I could make my own oud and save some money if I ever wanted to buy another one. With some measurements and initial advise provided by Najib Shaheen, I decided to begin the oud. I have several years of woodcarving and woodworking experience, so I wasn’t new to the subject. However, I consider instrument making to be the most refined form of woodworking, and I knew that I had much to learn, mostly patience. I decided early on that I did not care when I finished it. Shortly after I began the project I joined an on-line oud forum. I discovered from this source a man who makes ouds based on those of the early 20th century luthier Hanna Nahat of Damascus. (Nahat ouds are highly regarded, rare and very valuable. Many professional oud players use Nahat ouds, among them Simon Shaheen.) He published a book detailing the construction of an oud based on the Nahat design. The book is titled “Oud Construction and Repair” by Richard Hankey. This book will be the primary, but not only source for the construction of this oud. Feel free to email me if you have any questions.
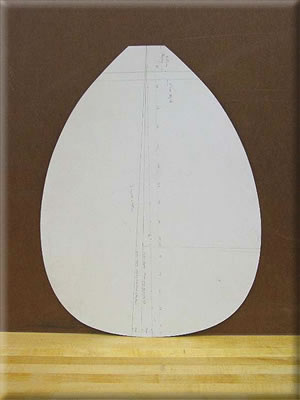
March 2002. I made the face pattern from a photo of an 1920′s Hanna Nahat oud. I considered using my own Turkish oud, but liked the rounder shape of the Nahat.
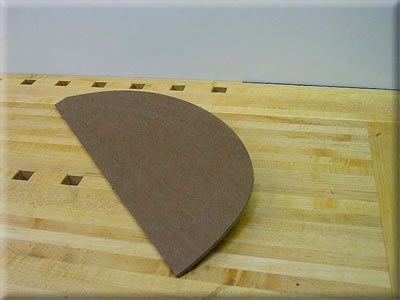
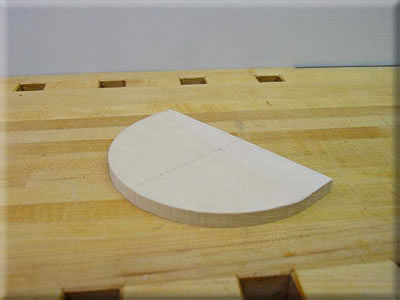
August 2002: The profile pattern is simply half the face pattern made of 1/4 material. I had some masonite on hand, so that is what I used.
Neck block roughed-out on the band saw with table tilted 45 degrees. I stayed well away from the layout lines in order to carve it to the final shape.
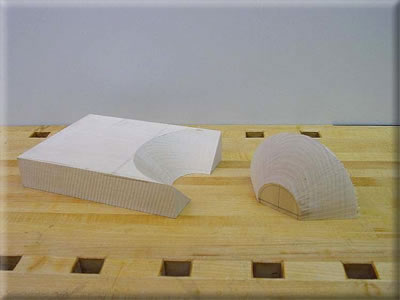
End Block before shaping.
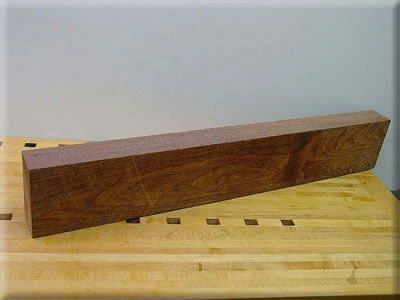
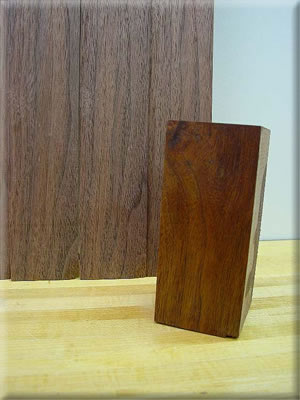
This is one of three walnut boards that I bought from a fellow woodworker. It was his father’s wood, so it is at least 40-50 years old. It has lots of color and nice grain.
I will keep the swirlier end towards the neck where it undergoes less bending. I probably have enough of this wood for two, maybe three ouds.
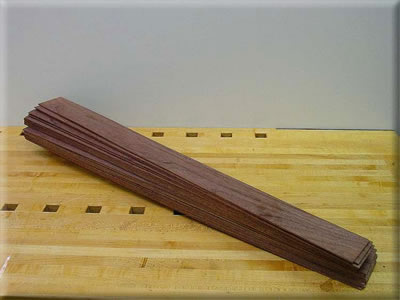
The board resawn into rib blanks and planed to just under 3mm. Incidentally, I have decided to use the metric system in building this oud. It presents certain advantages over the imperial system in this application.
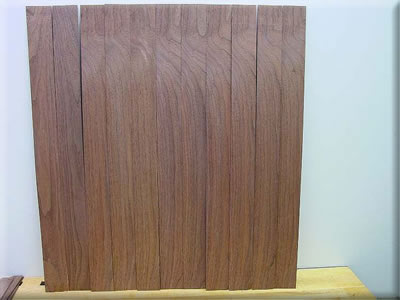
I rubbed about three coats of Minwax Antique Oil Finish into a scrap of the walnut to see what the finish might look like. The walnut took on a nice amber-red color with the application of the oil.
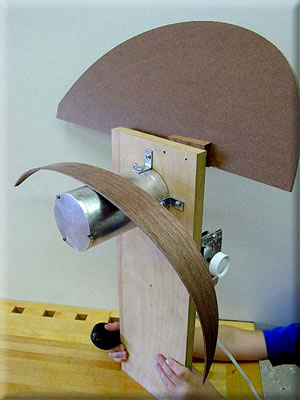
The bending iron I made for about $20. I used 3″ aluminum tube (3/16″ wall) and screwed a cover over the end to keep the heat in. The whole thing is bolted to L-brackets and the MDF board, which incidentally does not get hot.
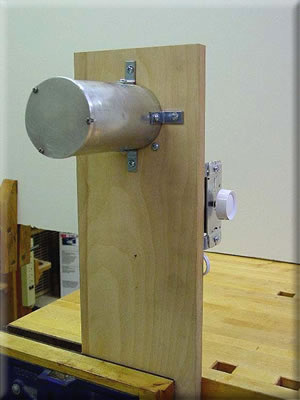
The heat comes from a 200 watt incandescent bulb mounted in a porcelain base, mounted to a nipple and ceiling-lamp bracket bolted to the board. I wired up a rheostat so I can control the heat. The aluminum gets very hot and I don’t have to turn the bulb up very much.
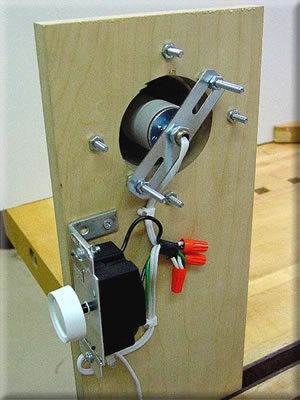
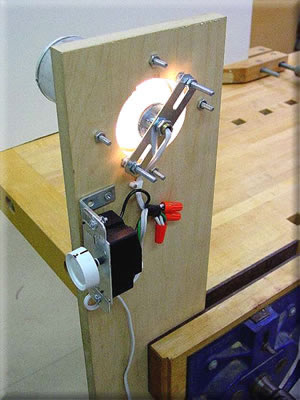
Bending iron heating up. It takes about 3-5 minutes and it is ready.
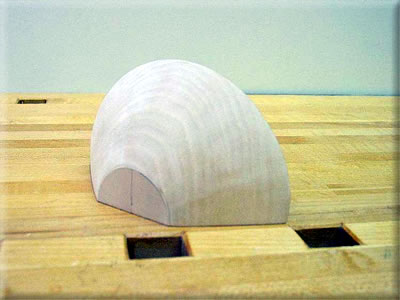
The end block carved to shape and sanded smooth.
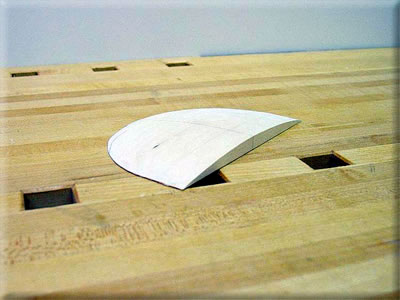
The neck block shaped and smoothed.
The Spreader Jig. The back is constructed using an open form method. Instead of using a mold, i.e. a positive image of the inside of the back built up of many pieces of wood like a boat hull, the neck and end blocks are screwed to bar of wood at precise locations. In this case, the length from the neck block to the outside of the end block is 48cm, minus the final thickness of the ribs (about 2.5mm) at the outside of the end block. The advantage of this type of construction is that one is forced to bend the ribs precisely to their final shape, rather than forcing the ribs against a mold and gluing them together under stress. Since I have very little experience bending wood, I have yet to develop the skill to achieve this precise shape. I prepared extra rib blanks in order to do this.
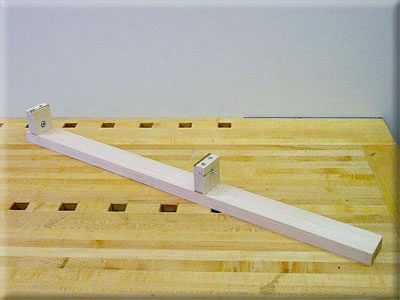
The spreader jig with end and neck blocks attached. The extra length of the bar serves no purpose. I didn’t bother to cut it off.
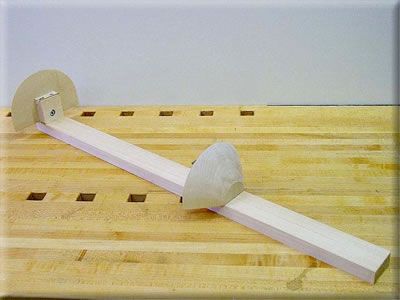
A close view of the neck block. One can see the screws which attach the square block to the bar, and the single screw which holds the neck block firmly in position
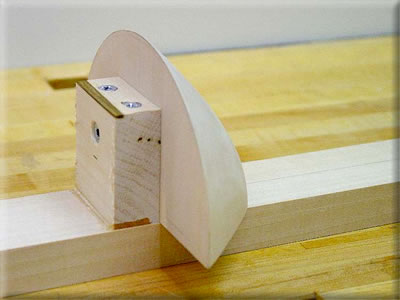
I attached the profile pattern to the back of the bender in order for it to be readily accessible while bending the ribs. I attached it with an angled block so it tilts rearward, making it easier to check the rib bending progress.
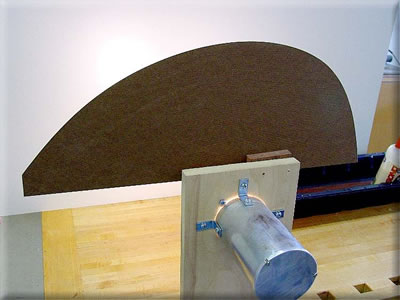
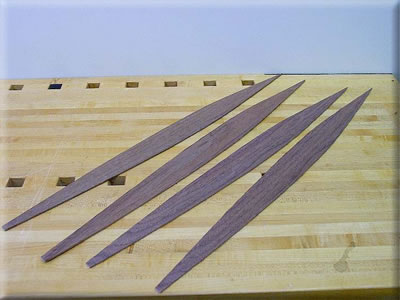
The ribs cut to general shape. For this oud, there will be 13 ribs. The neck end tapers to about 1cm, the tail end stops at a point. The ribs will shaped to their final dimensions after bending.
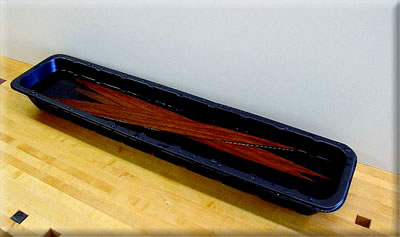
The ribs soak in water in preparation for bending. 15-20 minutes seems good for this walnut.
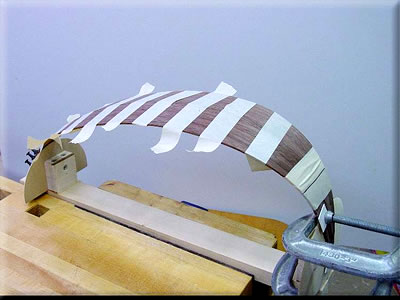
How the ribs are bent. The technique is not as simple as it seems. It is all too easy to over bend the curve or end up with some flat spots. One can flatten the rib if it gets too tight. The curve should be smooth. I can see now why an elliptical bending iron is better–the curve is shallower, thus lessening the chance of flat spots. I found that the first rib I tried (rib #1) took about 30 minutes to get right. The next two, half as long. I learned to start at the tail end and do a small section at a time in order to prevent over bending. The most difficult part is the tight curve at the deepest part of the back. Once it gets past that and towards the neck end, it goes very quickly. I considered mounting the bender vertically, and may still try this, but this method seems to work fine.
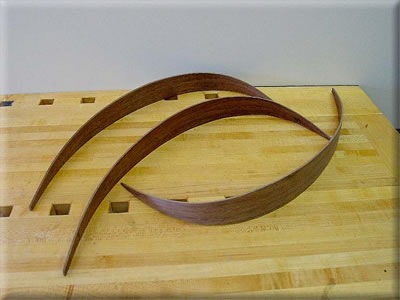
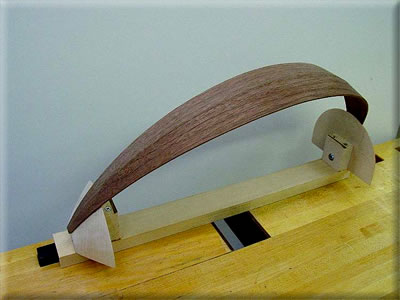
The first three ribs bent to shape. After a few minutes of drying, they opened up a bit. A little dry bending over the iron will take them back.
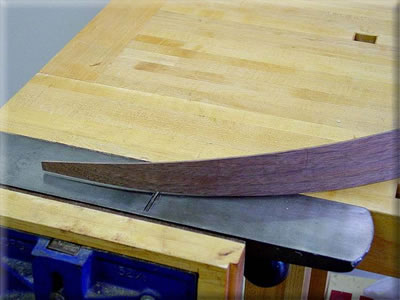
After the ribs are bent, they are planed flat. I was surprised at how flat the ribs ended up after bending. One would think from looking at the flat rib cut to shape, that it would not be so. A few passes over an inverted sharp jointer plane ensures the angle of the edge is not lost. The angle is automatically planed onto the edge by the way the rib sits on the plane because of the rib’s taper. Neat!
To check if the rib edges are flat, place the rib on a very flat surface. In this case, a piece of 3/4″ Baltic Birch plywood. I considered using my jointer table, but this seems accurate enough. Hankey’s book calls for sanding the edge flat on the same type of surface. I got pretty close with just my jointer plane, and it produces the best glue surface anyway. Nevertheless, I will probably try the sandpaper method as well to see if it is more accurate.
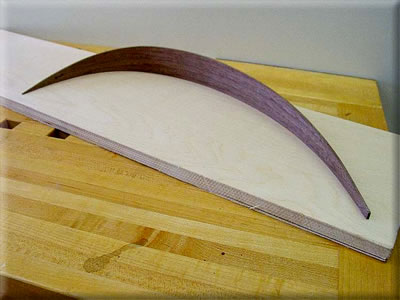
I decided to try the sanding technique for the edges after planing. The planing was a bit tedious. The sanding however registers the entire rib edge at once and produced an almost perfectly flat edge. When I tested it on the flat surface there was only about a 1/64″ gap which flattened out with almost no pressure.
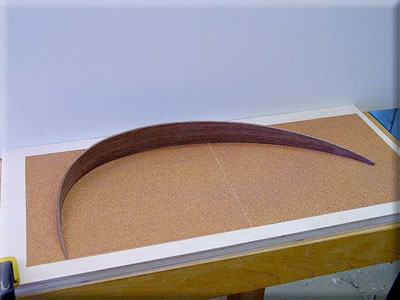
The 1st rib glued to the neck and end blocks. I began at the neck end.
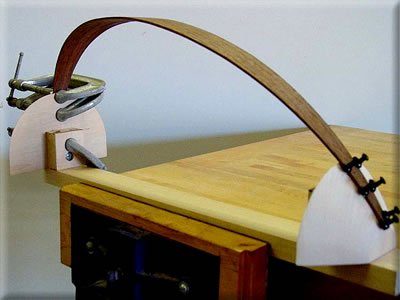
I spread a thin layer of glue on both block and rib. One wants only little tiny beads of glue as squeeze-out. Any more and it becomes a mess, too little and it is starved. Finding the right amount is the tricky part. The rib is held in position with thumb tacks. I think a little roughening of the pin of the tack would help it hold better, perhaps with a file or some coarse sandpaper. I overlapped the end of the block a little to allow for planing the neck surface flat.
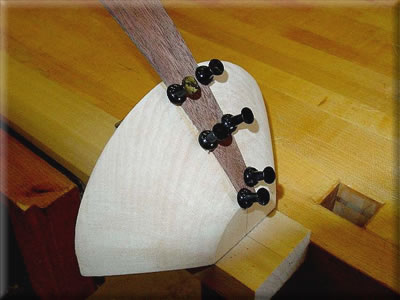
I glued up the end block the same way, instead using c-clamps and plastic cauls to protect the rib. I let it set up about 20 minutes only to find that both ends had slipped off center about 2mm! The rib was crooked. Luckily the glue was not totally cured. I rubbed each end against the bending iron and slipped an old Japanese Dozuki saw blade (very, very thin) between the rib and block. I did one at a time and reglued them each in their proper position. An hour later I removed the clamps and cleaned up the excess glue. The back had begun to emerge!
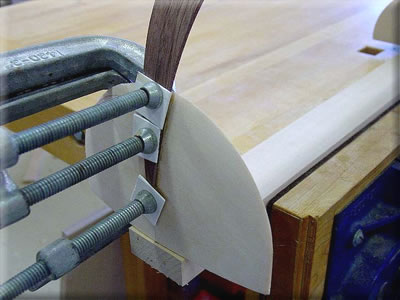
The second rib gets glued to the first. I jointed the edge as before, then tweaked the profile of the rib to match as close as I could the previous rib. The closer it matches the less work it is to glue it up, and the less internal stress is introduced, not to mention the back keeps a better shape as a result. After it is ready to glue, I joint the other edge so the next rib can be fitted to it. I clamped again at the neck end with the tacks, and with c-clamps at the tail end. The rest gets squeezed together with hand pressure and taped. I made sure the ribs lined up along their thickness as close as I could. This leaves the most material for smoothing. The rest of the ribs (except the last two) are fitted and glued this way.
The two ribs with clamps and tape removed.
Here one can see a section where the ribs are a bit offset and not totally flush. This is not a gap in the glue joint. The offset is only about .3mm so it will sand out easily.
A shot of the neck end. The glue joint is satisfactory.
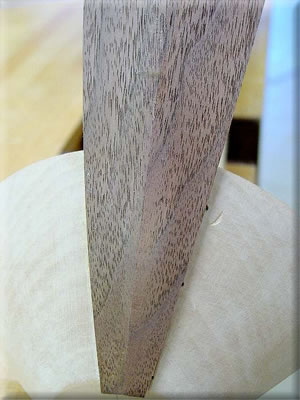
The tail end. This was very tricky to glue up. The glue joint is visible–but only about the width of a hair or two. It is very tight though right where the end block tapers off. The joint went together fine on a dry run. There is simply no way to draw the two ribs together very tightly without some sort of special clamp or caul. Masking tape will hold a good joint while the glue dries, but in this application it is not the best. I tried applying a c-clamp at an angle to perhaps draw the joint together, but this did not work. I will try to make the rest better, but I suppose this being my first oud, I can live with small discrepancies such as this. I wouldn’t think it would affect the tone. Also, I plan to cover the convergence of the points with a circle inlaid into the end block, not with a large piece of veneer as the Turkish do. This latter method would cover my mistake, but it is also a bit of a compromise in my opinion, the round inlay being a more tasteful way of covering the points.
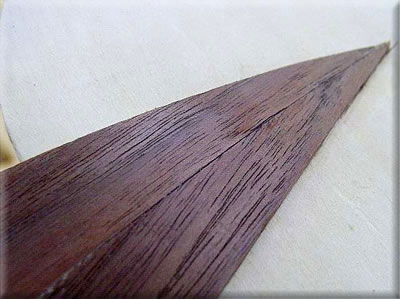
After I got the mediocre results on the first tail end rib joint I came up with this technique to get a better joint. After I have completely bent the rib to match the previous one and jointed the edge, I press the new rib to its mate with a good amount of hand pressure and tape it in place. I then continue to push as I clamp an offcut of rib stock right up against rib. This way, when I glue it up, the joint is very tight and cannot move. Also, because the offcut is the same thickness as the rib, it does not interfere with clamping the new rib to the end block. I also made sure to rub some paraffin wax all over the little offcut so it does not get glued to the end block or the edge of the rib
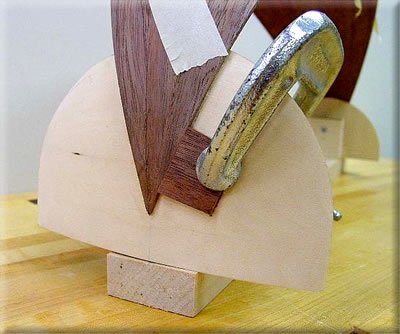
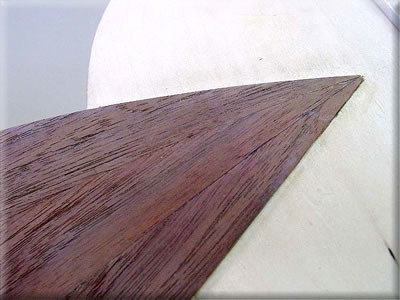
Here you can see the results of the improved gluing method. The joint is much better (almost invisible) than the first one below it. Clarification: I realized that the above text may be confusing after a discussion with Richard Hankey about the small offcut clamping technique described above. In order for the back to be built up successfully and retain its proper shape, each rib must meet flat against it’s mating rib and match as close as possible its curve. If the rib needs any pressure at the ends to close the joint, it will force the center portion of the rib to flatten out. It is very important that each rib not be forced out of shape, otherwise the back of the oud will end up flattened and the shape at the front will not be round. I devised the small offcut in order to prevent the rib from moving away from the previous rib while gluing, not to force the new rib against the previous rib. This is easy to do, and if done just a little each time will magnify the mistake at each rib. I in fact made this mistake on the third rib, but corrected it with the straightening jig seen below.
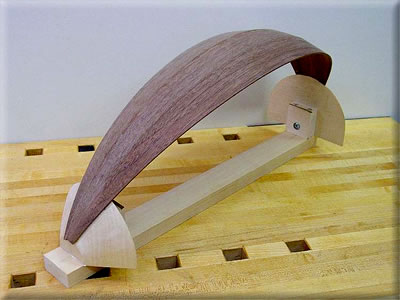
The back with three ribs completed.
I let about a week pass before I worked on my oud again, and when I went back to it, I found that the third rib did not quite match the profile pattern. It was a bit flatter than it should about 1/2 way between the apex and the neck. About 5mm. I followed Hankey’s advise about checking each rib against the profile pattern after each glue-up and correcting it immediately. To do so, I made a jig that is simply two blocks which are shaped for each side of the rib profile. I wet the misshaped rib and clamped it in the jig overnight. I was a bit skeptical that it would work, but sure enough, in the morning when I removed the clamps the rib was almost right at the proper shape. However, later in the day it had lost a bit of its shape. I will probably repeat this, but instead will glue the next rib to it as soon as possible to retain the shape. I anticipate having to make a few of these corrections as I near the full shape the of the back. I figure that by the time I am at the top two ribs, the shape will be just about right. I don’t think that it is extremely important that the shape of the face of the oud be exactly the same as the profile pattern. I will be satisfied with a discrepancy of a few millimeters here or there. I see now why so many oud makers use a mold to make the back. There is no chance of going away from the shape. I still think Hankey’s open form method may be superior, but requires more skill to execute.
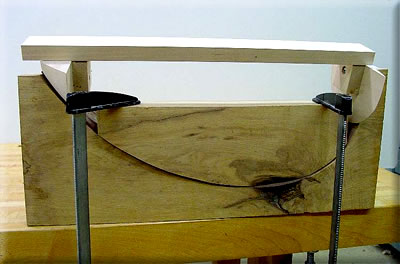
After straightening the third set of ribs in the jig I resumed work on the back. The fifth set went on smoothly, but was a bit off so I clamped it in the straightening jig as before. This time I left it in the jig for four days. (just by chance- I was out of town for that amount of time) It did not spring back at all. The shape was excellent. The sixth set went on the same way. I made absolutely sure that the ribs were as close to the shape and as absolutely flat as possible against the previous rib. This is the most important aspect of building the back because it ensures the back maintains its proper shape. See comments about the seventh set below.
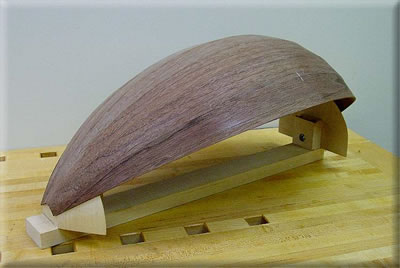
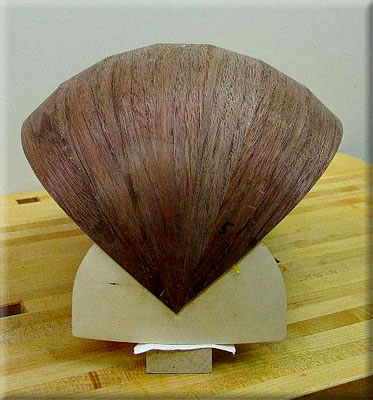
The far left rib is somewhat narrower than the far right one. This was done to balance a discrepancy on the right side. I took off a bit too much material getting it to lay flat and now the left side is about 4mm different than the right. I thought of using a new rib, but it fit so well that I hated not to use it. I will have to correct this again on the right side, but spread over the remaining three ribs on each side, it will not add up to much difference visually. Making sure the ribs fit flat is paying off. The seventh set matches the profile pattern very well.
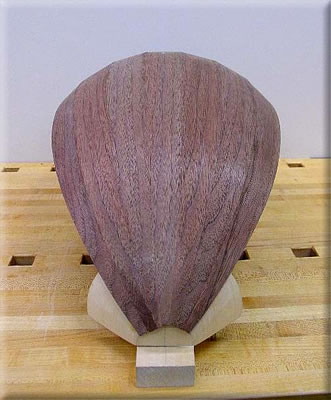
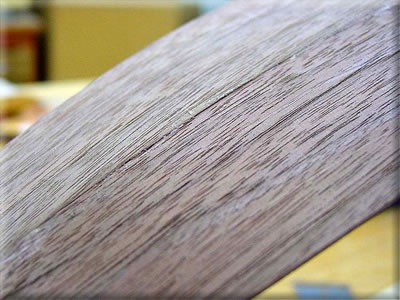
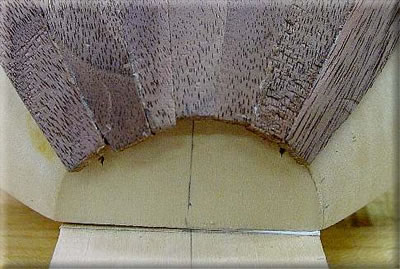
Here is a view of the neck end joints. This is a very close shot under raking light. Thus, the tearout and grain is accentuated. The joints are pretty good. The widths of the ribs are not all the same, however. Good thing I didn’t use contrasting wood or purfling. This would look even more crude. Ending up with equal ribs is proving to be more difficult than I had anticipated.
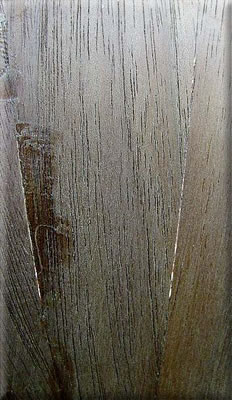
As I built up the back I decided that I would start getting extra finicky with the joints and test them with a flashlight from inside the back. A good joint is light-tight. This is an excellent way to test if your joints are going to close up perfectly at glue-up. Simply tape the fitted rib without glue in place and shine the light from inside toward the joint. It will tell you immediately where you need to improve the fit. Up until the seventh set, I did this without the light, so the seventh set joints are indeed light-tight. As I was doing this, I discovered on a previous joint (between 3rd and 5th set) some light peeking through. Luckily this was only in a very small area. Most of the area is glued, but there are some “pins” of light visible where there is no glue. (see photo with light off at left, and on, below) The joint is very tight and not loose in any way. After the paper gets glued to the inside of the joint, it will strengthen it considerably. Of course it is not ideal, it is a weak spot, but hopefully not enough to cause any problems in the future. Incidentally, I once heard an oud whose back had been accidentally broken by a dancers’ sword–the ribs were shattered and there was a large hole in the back. Interestingly, the sound was virtually unaffected.
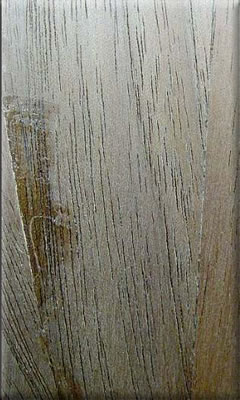
The pins of light shining through the imperfect area of the joint.
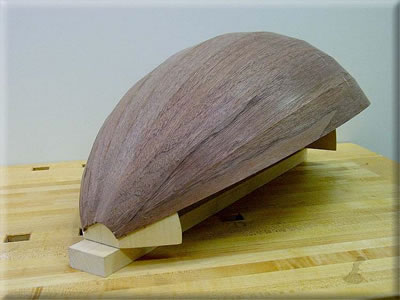
The ninth set of ribs completed.
Ninth set, front view. The back is a bit, in total, narrower than it should be at this point, about 1.5cm on each side. They are however the same width on either side of the center line of the back, which is good.This is a result of removing too much material in fitting the ribs. I will make up the difference in the last two ribs.
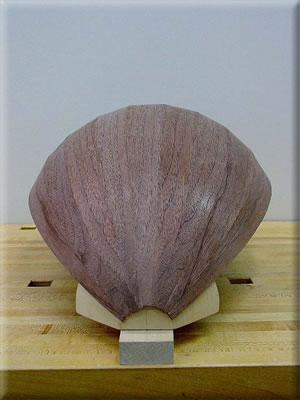
After joining the ninth set of ribs I discovered that one of the blocks had shifted at some point. Here the end block shows the discrepancy. I was told that this is not so uncommon, although I was fairly disappointed when I discovered it. As a result, one side of the back leans about 1cm lower than the other. After I complete all the ribs the back will be planed flat and this mistake will be removed in the process. I will lose a bit of the extra depth of the back, but it shouldn’t be much. And the top ribs will not be perfectly symmetrical. (I will disguise this with a tailpiece which will distract the eye away from the discrepancy.) The majority of the material will be removed toward the tail end and not at the neck block. The neck block needs to keep its dimensions in order for the neck to meet up with the body correctly. A future prevention of this problem was related to me by Richard Hankey: use two screws in each block to prevent twisting.
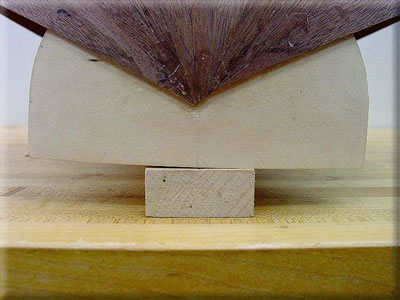
Eleven ribs completed
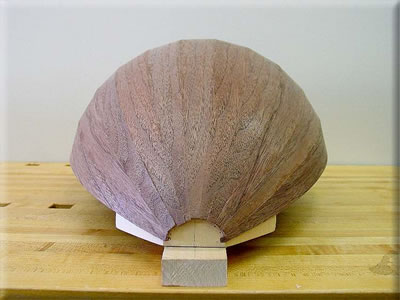
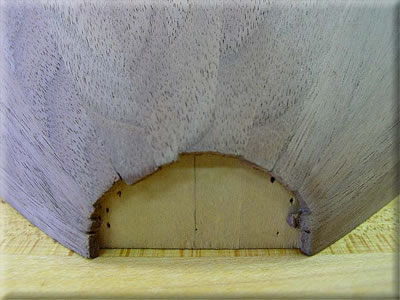
It is very difficult to make the ends of the ribs at the tail end finish in a point. I have seen ouds that come very, very close. Some sort of decorative cover plate or inlay is always used. My attempt is obviously a ways off from ideal. I removed too much material at the ends when making the ribs lie flat. There is a certain technique involved to keep the correct dimensions when jointing the ribs that cannot be explained. One must learn it in practice
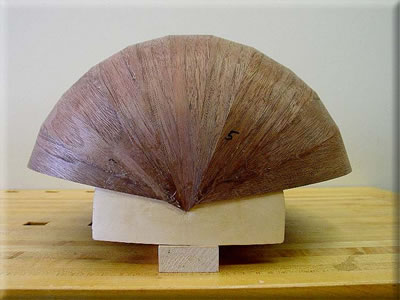
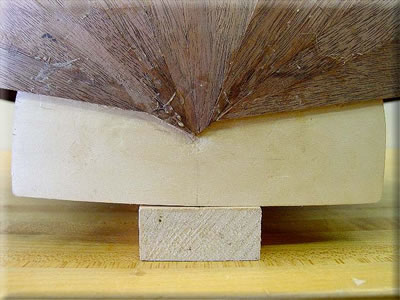
Here I trimmed the junction smooth for the last two ribs. I extended a line from each of the two ribs until they met and removed the excess material. The remaining areas of the end block are fairly symmetrical.
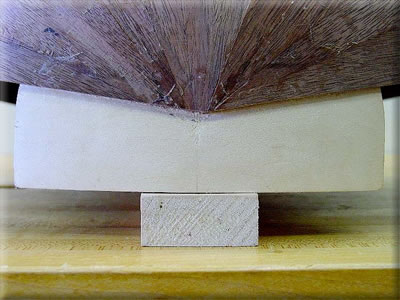
The oud back with eleven ribs.
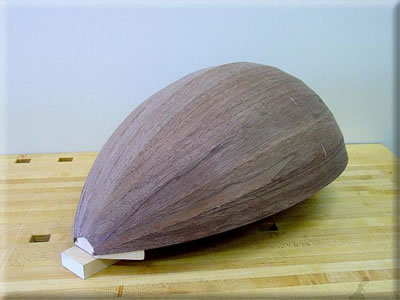
Here I am clamping the last rib on what will be the bottom of the back. The last ribs are bent while they are square. The rib is then placed in position on the neck and end blocks so one edge is proud of the tops of the block by about 5mm. (This is the front face of the oud) Then from the inside of the back a line is drawn along the edge of the previous rib to establish the contour. The last rib is then cut along this line and fit and glued. The extra 5mm is to allow for jointing the opposite edge and for flattening the face of the back when it is completely done. Hankey says to use the tacks to glue this part, but mine just didn’t hold. I taped an angled caul onto the front of the back and used a clamp to close this joint. I am not forcing this shut due to bad joinery. The clamping pressure is very light, otherwise the tape would break.
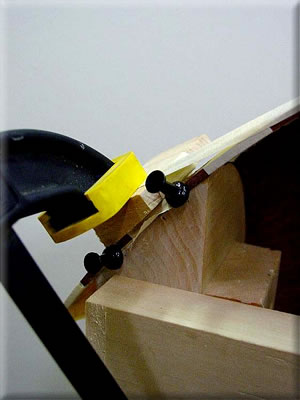
I left the last rib about 2-3cm long. It ended up being a very handy choice. I was able to wrap some tape around this protrusion and pull the rib tight against the previous one ensuring that it didn’t slip during glue-up.
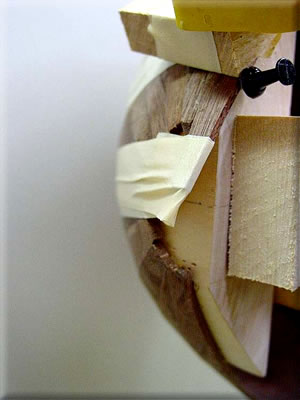
The tail end is clamped in the normal manner except no extra caul can be used to discourage slippage because there is no tail block left. Four clamps are used because of the added surface area. It cannot be seen here, but the end of the rib is 90 degrees from the top of the end block and planed flat in order to meet up with the other rib end.
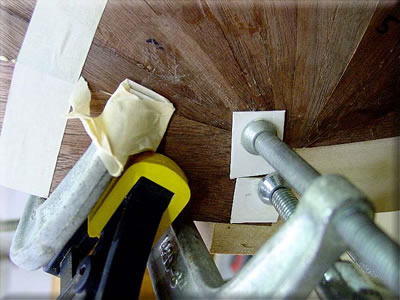
Tail end view of the twelfth rib.
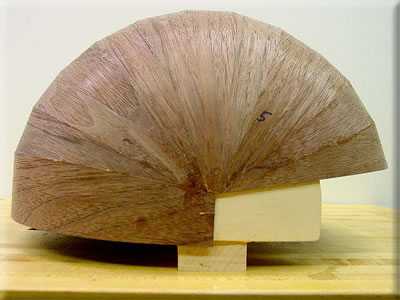
Thirteen ribs completes the back.
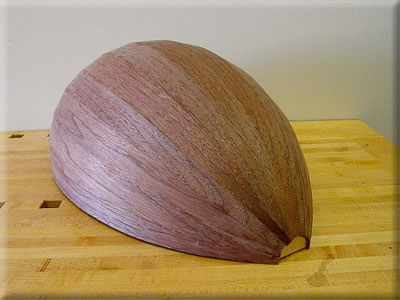
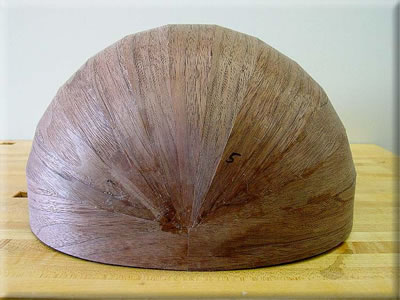
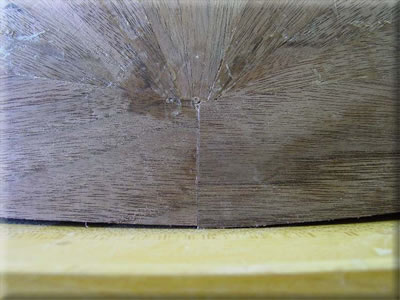
The butt joint is not as good as it could have been. I spent a good amount of time fitting it very well, (it was absolutely tight) but then got a bit frantic at glue up and it did not close up as well as I had anticipated.
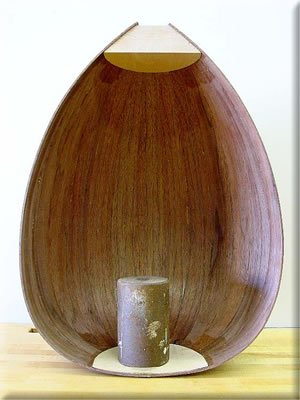
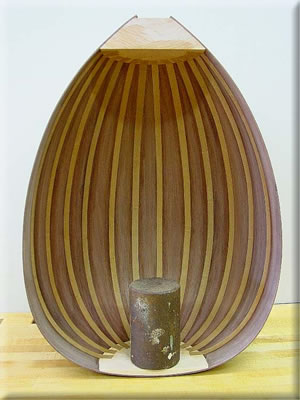
The completed back. The symmetry of opposite sides is fairly good. I traced the profile onto some posterboard and took measurements every 3cm or so across the width. The worst area was about 2-3mm difference, the rest were the same or less than 1mm different. For this first oud, I am satisfied with the shape. Note: the iron anvil on the end block is simply a weight to hold the back upright while photographing it.
The next step is to lay the back down on a flat surface, mark, then remove the high spots with a block plane. Because of the crooked tail block, I had to remove some extra material, but not more than 2 or 3mm. The tape on the edge is explained in the next entry.
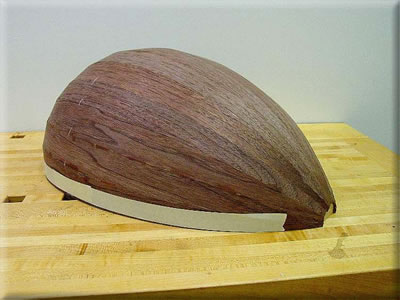
After the top ribs and blocks are flattened, the top edges of the ribs are relieved for various reasons. Hankey explains them in the book. The deepest part of the relief comes at the widest part of the body. Hankey says to make a mark at this point and plane smoothly to it. In my inexperience, I decided I needed a bit more guidance than just my eye. I used some masking tape as a guide to show the areas to be removed. I then planed right up to the tape with the block plane, removed the tape and sanded the edge smooth. The resulting curve was very smooth and the same on the both sides of the back.
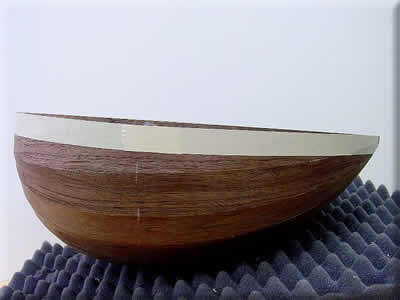
The back sanded to 150 grit. Hankey recommends the back be between 1 and 1.5mm thick, with the top edge at least 1.5. In the book he says to start with ribs that are 2-3mm thick. Mine were 2.5mm. To remove an entire millimeter with sandpaper and scraper in an even manner from the entire back is a task that I am not up to. I surmised that to accomplish this would probably take an entire day or more of sanding and scraping. Again, not something I am too interested in. I think that if the back is to be 1 or 1.5mm thick, the ribs should be very close (I mean within .3 or so mm) to that when the back is built up, otherwise there is too much material to remove. Better to use thin ribs and build more precisely so there is minimal material to remove at the joints. There are also different thicknesses for different woods, so I am told, based on the wood’s density. Walnut is obviously a much different wood than hard maple, which could easily take on a thinner dimension I would guess. Lebanese Oud maker Nazih Ghadban (see link on home page) told me that for walnut, 2.4mm is very good. I was relieved to hear this. Hankey also told me that 2.4 can work, just that a thinner back is better. I also think that the thinner back may produce a different sound than a thicker back. Turkish style ouds to me have a longer sustain and a “lighter” more open sound. The Arabic ouds I’ve heard are more thick sounding, louder, and little more “hard edged”. Perhaps this is due to the heavier construction of Arabic ouds.
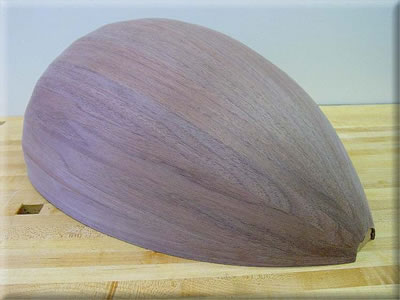
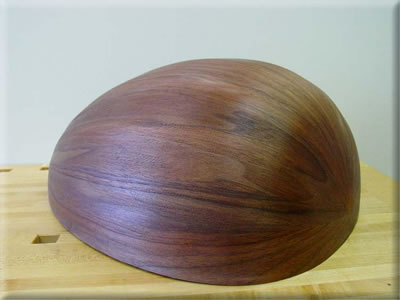
The back with some mineral spirits wiped on to reveal any glue stains or anamolies.
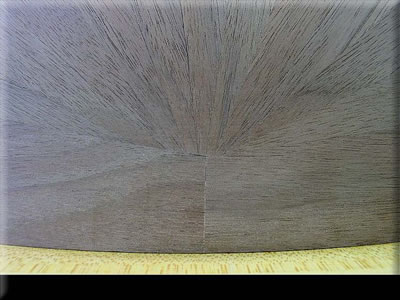
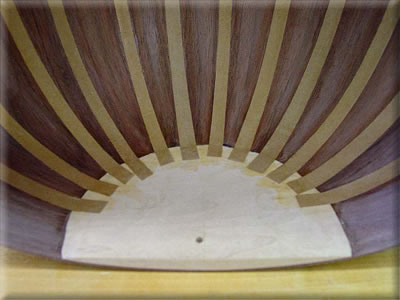
The joints on the inside of the back are covered with a heavy paper after the inside is scraped and sanded smooth. They are left a bit long to be glued to the neck and end blocks.
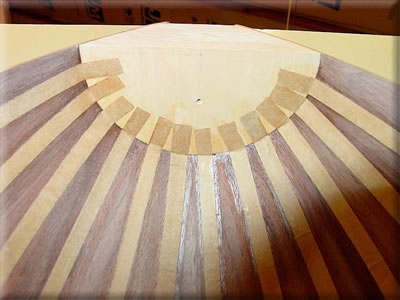
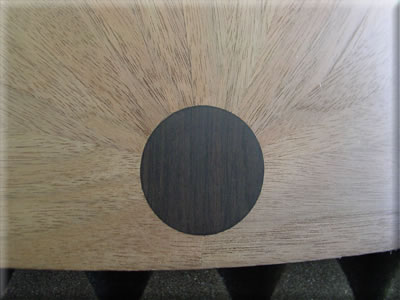
The tail cover plate inlaid into the back. The piece is African Blackwood. I originally planned to inlay a round piece of walnut into this, leaving about 4mm’s of the Blackwood. I am not totally confident in my inlaying technique, so I have decided to leave this as is, since it inlayed very well. I made the circle a bit too large, and the Blackwood is a bit dark for this application, but it serves its purpose.
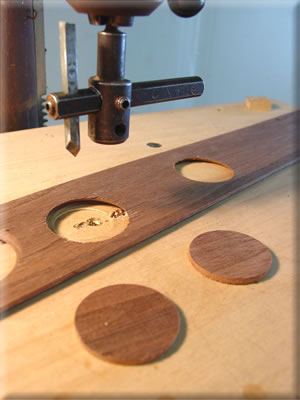
I used a circle cutter in the drill press to cut out the inlay for the tail cover. I cut out the inlay in scrap walnut first in order to fine tune the setting of the cutter so the real inlay would fit perfectly. It took about five trials before I got it just right.
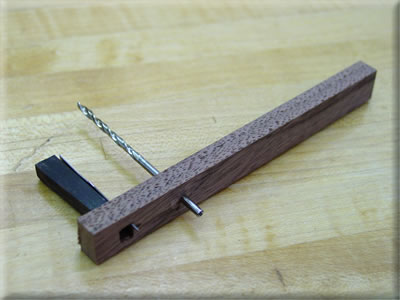
This is the tool I made to cut the recess for the inlay. It is an exacto knife blade held in place with a wedge. I drilled a pivot hole in the oud back where the center of the inlay would go, then used the same bit to cut the pivot point in the tool at the correct radius. I used the bit itself as the pivot. The tool works fairly well, although it is not adjustable. The recess for the inlay is cut before the inlay itself, so no adjustability is necessary. After I made a few passes with the tool, I carved away a bit of the recess up to the cut line. After repeating this process a few times, the recess was at the right depth around the edge and the outline was well established. Using a laminate trimmer with a 1/8″ straight bit, I routed the waste from the majority of the recess, staying about 2mm away from the edge. I cleaned up the areas the router missed with a chisel and exacto knife.
- Turkish Oud Construction (2)
http://www.khalafoud.com/Jameel_OudConstruction.htm




Hello, félicitations for your Nahat style oud.
I have buy the book of Richard Hankey, but because of the Cov-19 in France, I have never became it !
I am waiting for it, but if you have some website or any other sources… please same me a email in order to share it me.
Thank you, best regards,
Guillaume
C’est un bon travail et bien expliquer. Bravo et merci beaucoup pour le partage.
Cordialement.
Gharbi
Estimado maestro FELICiTACIONES por su trabajo y su generosidad. Quería hacerle una pregunta.
Como se llega a la medida correcta de las costillas en su parte mas ancha y ¿ dónde queda ese ancho máximo dentro del largo de la costilla?
Desde ya Agradezco mucho su generosidad!
Claudio
Cher professeur BRAVO pour votre travail et votre générosité. Je voulais vous poser une question.
Comment arrivez-vous à la mesure correcte des côtes dans leur partie la plus large et où se situe cette largeur maximale dans la longueur de la côte ?
Merci beaucoup d’avance pour votre générosité !
Claudio
Great work, and detail.
Just one question/request: can you show how you roughed out the neck piece using the bandsaw ?
Thanks.